Special Offer: Use code ILOVEPLANTS for 25% off on all digital products! Shop Now →

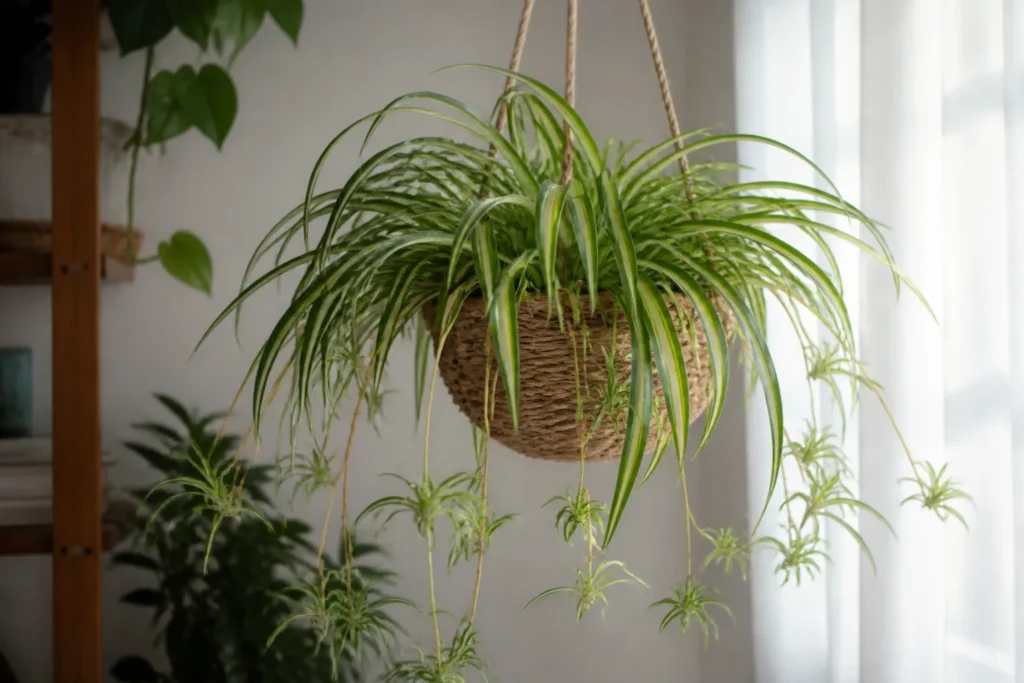
Spider plants are one of the easiest houseplants you can own. They forgive missed waterings, grow fast, clean up a shelf or hanging basket in a season, and even make free baby plants you can share. But many plant parents still run into the same frustrations: brown leaf tips, pale leaves, or a plant that never sends out babies. Good spider plant care is simple once you know a few basics.
This guide covers everything you need to keep a spider plant (Chlorophytum comosum) lush and full: light, watering, soil, feeding, how to get and root spider plant babies, and quick fixes for the most common problems.
Short answer: Give your spider plant bright, indirect light, water when the top inch of soil is dry (about every 1 to 2 weeks), use a well-draining potting mix and a pot with drainage holes, keep it between 60 and 80°F (15 to 27°C), and feed lightly once a month in spring and summer. Brown tips usually come from salty or chlorinated tap water, too much fertilizer or uneven watering. Spider plants are non-toxic to cats and dogs.
In this guide
Spider plant care at a glance
| Need | What your spider plant wants |
|---|---|
| Light | Bright, indirect light. Tolerates medium light; avoid hot afternoon sun. |
| Water | When the top inch of soil is dry, roughly every 1 to 2 weeks. Less in winter. |
| Water type | Rainwater, filtered or distilled water helps prevent brown tips. |
| Soil | Well-draining, all-purpose potting mix with a little perlite or bark. |
| Temperature | 60 to 80°F (15 to 27°C). Keep above 50°F (10°C). |
| Humidity | Average home humidity is fine; 40 to 60% keeps tips greener. |
| Fertilizer | Balanced liquid fertilizer at half strength, monthly in spring and summer. |
| Repotting | Every 1 to 2 years, when roots fill the pot. |
| Pet safety | Non-toxic to cats and dogs (ASPCA). |
| Difficulty | Very easy, great for beginners. |
Light: bright and indirect is best
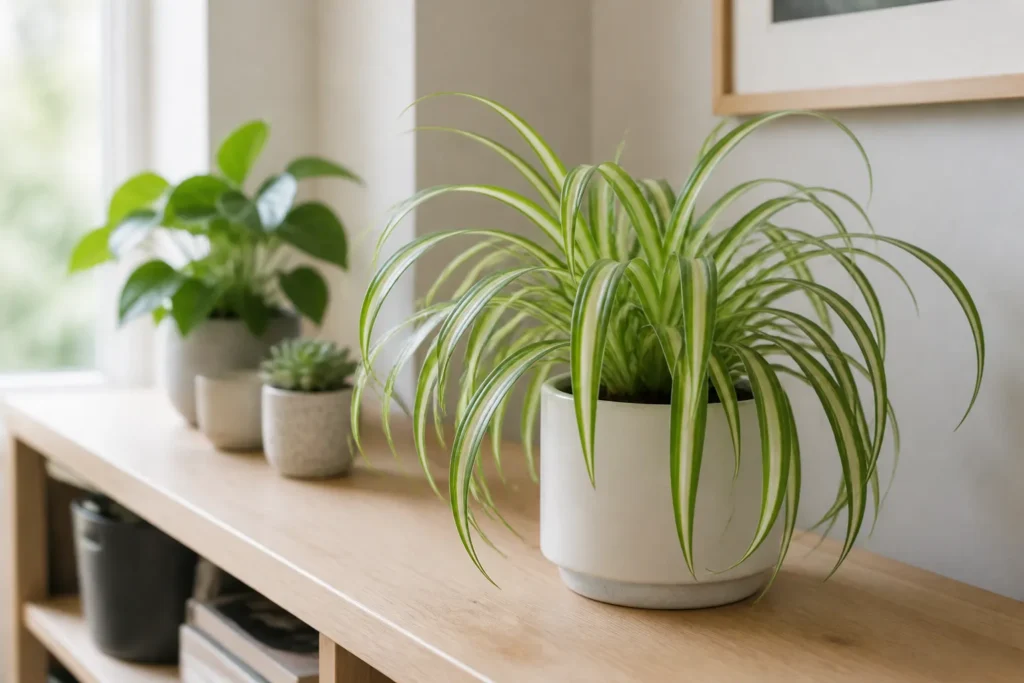
Spider plants grow best in bright, indirect light, such as a few feet from an east or west window, or near a south window with a sheer curtain. Good light keeps the leaves full, the stripes crisp, and encourages flowers and babies.
- Too little light: slow growth, floppy or pale leaves, faded stripes on variegated types, and few or no babies.
- Too much direct sun: scorched, bleached or brown patches on the leaves, and soil that dries out too quickly.
- Low-light homes: spider plants tolerate medium light and do well under a simple LED grow light for 10 to 12 hours a day.
Not sure how bright your spot is? Our houseplant light guide shows you how to read your windows in minutes.
How often to water a spider plant
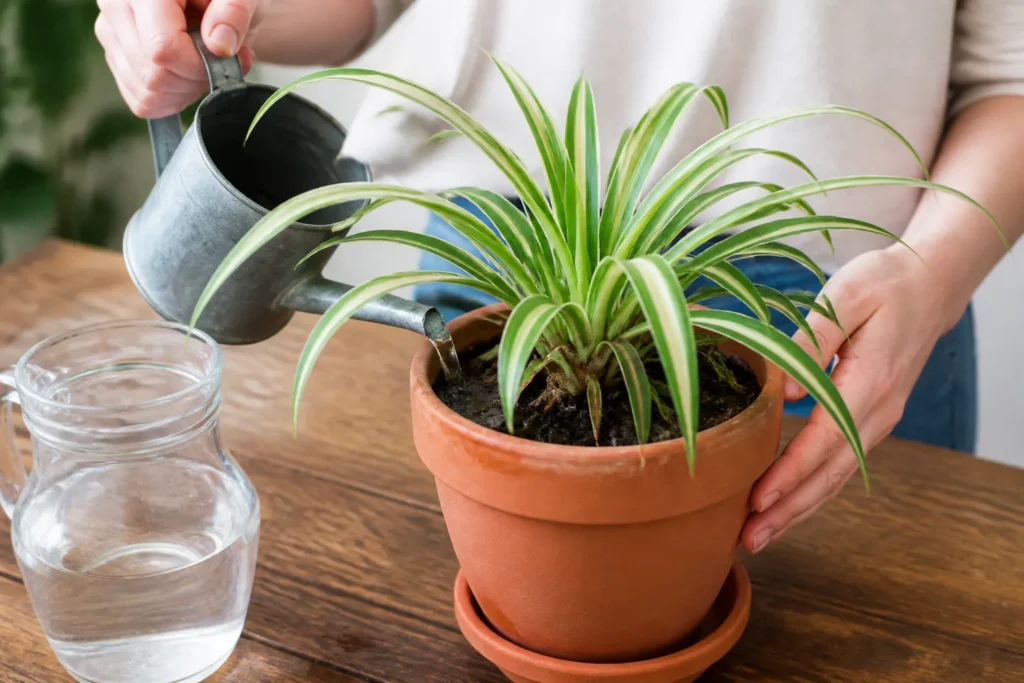
Water when the top inch of soil feels dry. In spring and summer that is usually every 1 to 2 weeks; in winter it may be every 2 to 3 weeks. Spider plants store water in thick, white tuberous roots, so they handle a missed watering far better than constant wet soil.
- Water slowly until it runs out of the drainage holes, then empty the saucer after 10 minutes.
- Never let the pot sit in water. Soggy soil is the fastest way to root rot.
- Lift the pot: a light pot means it is time to water, a heavy pot means wait.
- In hanging baskets the soil dries faster, so check more often in summer.
Water quality matters: spider plants are sensitive to fluoride, chlorine and mineral salts in some tap water, which build up and burn the leaf tips. If you see brown tips, switch to rainwater, filtered or distilled water, or let tap water sit out overnight to let chlorine escape, and flush the soil with plain water every couple of months.
For more on timing and technique, see how to water houseplants.
Best soil and pot for spider plants
Use a light, well-draining all-purpose potting mix. Mixing in about one part perlite or orchid bark to three parts potting soil keeps it airy. Avoid heavy garden soil, which stays wet and suffocates the roots.
Always choose a pot with drainage holes. Spider plants like to be slightly snug in their pot, so go only 1 to 2 inches wider when you size up. Plastic and glazed pots hold moisture longer; terracotta dries faster and suits heavy-handed waterers. Learn more in our potting soil guide.
Temperature and humidity
Spider plants are happiest at normal room temperatures of 60 to 80°F (15 to 27°C). They tolerate brief dips but should be kept above 50°F (10°C). Keep them away from cold drafts, open doors in winter and blasting heaters or air conditioning vents.
Average household humidity is fine. Very dry indoor air, especially with winter heating, can add to brown tips, so grouping plants together or using a small humidifier helps. See our humidity guide and temperature guide for simple fixes.
Fertilizing your spider plant
Spider plants are light feeders. Use a balanced liquid fertilizer diluted to half strength once a month in spring and summer, and stop feeding in fall and winter when growth slows.
More is not better. Too much fertilizer leaves salts in the soil that cause brown tips and can slow baby production. If you see a white crust on the soil, flush the pot with plain water. Our fertilizing guide explains how to feed without burning roots.
Spider plant babies: how to get them and grow them
The little plantlets that dangle from long stems are called spiderettes or pups. A healthy, mature spider plant first sends out long stems (stolons) with small white flowers, and baby plants form along them.
Why your spider plant is not making babies
- It is too young: most plants need to be mature, often around a year old, before they produce runners.
- Not enough light: move it to brighter, indirect light.
- The pot is too big: spider plants tend to flower and make babies when slightly root-bound.
- Lights on at night: spider plants form flowers when nights are long, so a spot that stays lit late into the evening can delay runners.
- Too much fertilizer: extra feeding pushes leaves instead of runners.
How to propagate spider plant babies

Spider plants are one of the easiest plants to propagate. Choose babies that have small nubs or roots starting at the base, then use any of these methods:
- Water method: snip the baby off, set its base in a small glass of water with the leaves above the waterline, and change the water every few days. Pot it up when roots are 1 to 2 inches long, usually in 1 to 3 weeks.
- Soil method: plant the baby directly in moist potting mix and keep the soil lightly damp for the first few weeks until it roots.
- Attached method (most reliable): pin the baby onto a small pot of soil next to the mother plant while it is still connected. Once it roots and shows new growth, cut the runner.
How to repot a spider plant
Repot every 1 to 2 years in spring, or when you see roots circling the pot, poking out of drainage holes, or pushing the soil up. The thick roots of a crowded spider plant can even crack or bulge plastic pots.
- Water the day before so the root ball slides out easily.
- Choose a pot only 1 to 2 inches wider, with drainage holes.
- Loosen circling roots and trim any that are mushy or brown.
- Set the plant at the same depth, fill with fresh mix and water well.
- A very large plant can also be divided into two or three smaller plants with healthy roots on each.
Our repotting guide walks you through it step by step without shock.
Popular spider plant varieties

| Variety | Look | Good to know |
|---|---|---|
| Green spider plant | Solid green leaves | Most tolerant of lower light. |
| Variegatum | Green center, cream or white edges | Classic look; needs bright light to keep stripes. |
| Vittatum | White center stripe, green edges | The most common striped type in stores. |
| Bonnie | Curly, twisting leaves with a cream stripe | Compact, great for shelves and small spaces. |
| Hawaiian / Golden Glow | Lighter green to golden-tinged leaves | Brightest color in bright, indirect light. |
Common spider plant problems and fixes
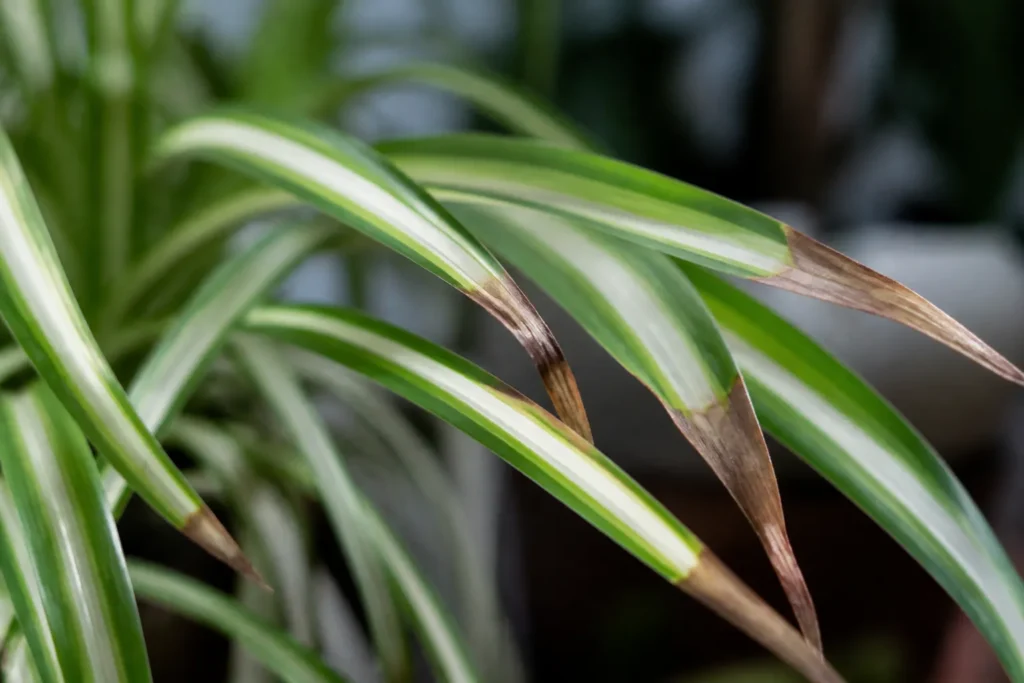
Brown leaf tips
Spot it: Dry, crispy brown ends on the leaves, often on older leaves first.
Why it happens: Fluoride, chlorine or salts in tap water, fertilizer buildup, very dry air or letting the soil swing between bone dry and soaked.
Fix it: Trim the brown tips with clean scissors, following the leaf shape. Switch to rainwater, filtered or distilled water and flush the soil with plain water to wash out salts.
Prevent it: Water consistently, feed only at half strength, and raise humidity in winter.
Yellow leaves
Spot it: Leaves turn pale or yellow, sometimes with soft stems.
Why it happens: Most often overwatering or poor drainage; sometimes too little light or old leaves naturally aging.
Fix it: Let the soil dry to the top inch before watering, check drainage, and move to brighter indirect light. Remove fully yellow leaves.
Prevent it: Water by soil feel, not by schedule. See yellow leaves on houseplants for more causes.
Mushy base or root rot
Spot it: Soft brown base, a bad smell from the soil, wilting even when the soil is wet.
Why it happens: Soil that stays wet too long, a pot without drainage, or a saucer full of water.
Fix it: Unpot the plant, cut away mushy brown roots, keep healthy white tubers, and repot in fresh, dry mix. Rooted babies are a good backup if the mother is badly damaged.
Prevent it: Use a draining pot and mix, and empty saucers after watering.
Faded or pale leaves
Spot it: Stripes look washed out or the whole plant looks pale and limp.
Why it happens: Too little light, or sometimes too much harsh direct sun bleaching the leaves.
Fix it: Move the plant to bright, indirect light, a few feet back from a sunny window.
Prevent it: Rotate the pot every couple of weeks for even growth.
Pests
Spot it: Fine webbing and speckled leaves (spider mites), white cottony spots (mealybugs) or sticky leaves (aphids or scale).
Why it happens: Dry, warm indoor air and stressed plants attract pests.
Fix it: Rinse the plant in the shower, then treat with insecticidal soap or neem oil every 5 to 7 days until clear. Isolate it from other plants.
Prevent it: Wipe leaves and check under them regularly. Our houseplant pests guide covers each pest.
If your plant looks really unhappy, our guide on how to revive a dying houseplant can help you bring it back.
Is a spider plant safe for cats and dogs?
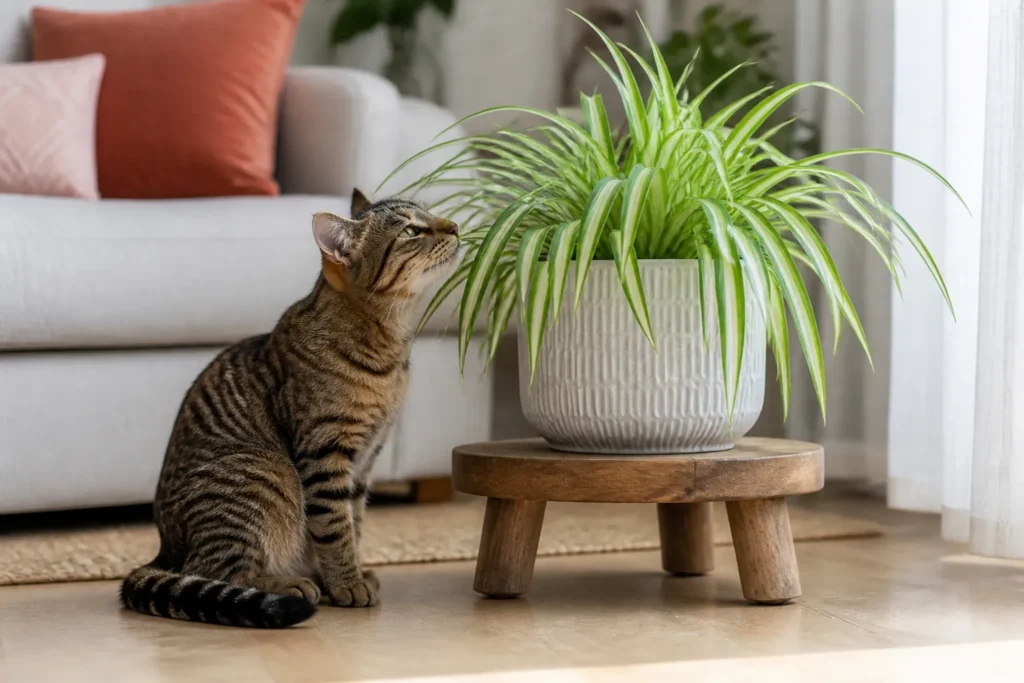
Yes. Spider plants are listed as non-toxic to cats and dogs by the ASPCA, which makes them one of the best choices for pet homes. Cats in particular love chewing the grassy leaves, and eating a lot can cause a mild upset stomach or vomiting, so a hanging basket keeps both the plant and your cat happy.
Looking for more safe options? See our list of pet-friendly houseplants.
More plant care guides: Snake plant care · Monstera care · Fiddle leaf fig care · ZZ plant care · Bird of paradise care · Lucky bamboo care · Orchid care · Peace lily care
Brown tips spreading or a spider plant that looks pale and limp?
The Houseplant Rescue Guide matches 26 common plant problems to a clear photo, then gives you simple steps to fix each one and stop it coming back. No jargon, 50 pages, with printable checklists.
Quick action checklist
- Place in bright, indirect light, a few feet from a window.
- Water when the top inch of soil is dry; empty the saucer.
- Use rainwater, filtered or distilled water if you see brown tips.
- Use a well-draining potting mix and a pot with drainage holes.
- Feed at half strength once a month in spring and summer only.
- Keep between 60 and 80°F and away from cold drafts.
- Trim brown tips and yellow leaves with clean scissors.
- Repot every 1 to 2 years when roots fill the pot.
- Root babies in water or soil to make new plants.
- Track watering and feeding in a printable plant journal.
Spider plant care FAQ
How often should I water a spider plant?
Water when the top inch of soil is dry, which is usually every 1 to 2 weeks in spring and summer and every 2 to 3 weeks in winter. Always let excess water drain away.
Why are the tips of my spider plant turning brown?
Brown tips are usually caused by fluoride, chlorine or salts in tap water, too much fertilizer, very dry air or uneven watering. Trim the tips, switch to filtered or rainwater and flush the soil.
Do spider plants like direct sun?
No. Spider plants prefer bright, indirect light. Gentle morning sun is fine, but strong afternoon sun can scorch and bleach the leaves.
How do I get my spider plant to make babies?
Give it bright, indirect light, let it get slightly root-bound, avoid overfeeding and keep it somewhere with naturally dark nights. Mature plants usually start producing runners once they are about a year old.
Can I cut off spider plant babies?
Yes. Cut babies off once they have small roots or root nubs at the base and root them in water or soil. Removing babies also lets the mother plant put more energy into new leaves.
Are spider plants safe for cats?
Yes. Spider plants are non-toxic to cats and dogs according to the ASPCA. Cats often chew them, and eating a lot may cause mild vomiting, so hang the plant out of reach if needed.
Should I cut the brown tips off my spider plant?
Yes, you can trim brown tips with clean scissors for a neater look. Cut at an angle to follow the natural leaf shape and leave a tiny brown edge so you do not cut into healthy tissue.
Sources and further reading
Want to go deeper? These university extension and expert resources cover the same topic:
- NC State Extension Plant Toolbox: Chlorophytum comosum (spider plant)
- University of Illinois Extension: Spider plant
- ASPCA: Toxic and non-toxic plants list
[…] plant care guides: Spider plant care · Snake plant care · Monstera care · ZZ plant care · Fiddle leaf fig care · Bird of paradise […]
[…] Full care: see our spider plant care guide […]
[…] plants: dracaena, spider plants, calatheas and prayer plants can get brown leaf tips from fluoridated water. Use rainwater or […]